Serving Eugene, Greater Portland, Vancouver, Everett, Bellingham, and Nearby Areas
Serving Eugene, Greater Portland, Vancouver, Everett, Bellingham, and Nearby Areas
Click on a photo to enlarge.
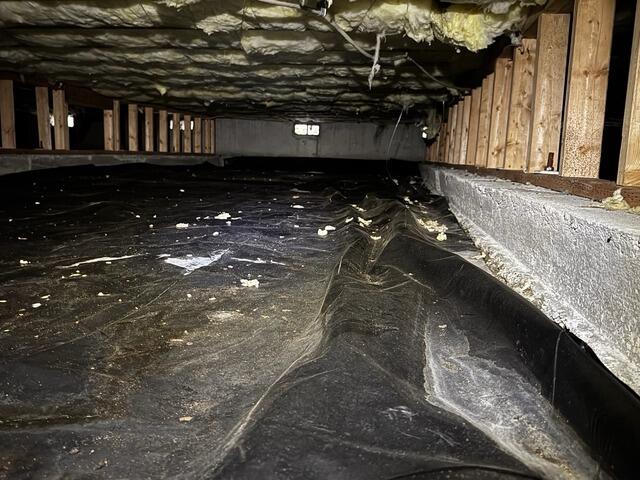
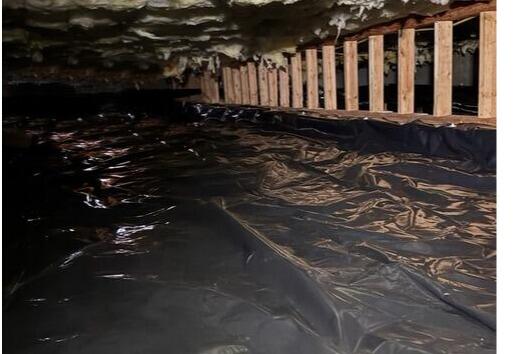
When water enters a crawl space and has no where to go, it becomes stagnant and creates a lot of issues for a homeowner. One of the main problems with water intrusion in a crawl space is that moisture can raise indoor humidity causing discomfort and potential damage to the home above; flooring, walls and furniture. Moist environments also attract unwanted pests that can cause further structural damage and introduce health hazards. These homeowners wanted to find an option that addresses the water in their crawl space so they reached out to John's Waterproofing to schedule their free visit. We went out and thoroughly inspected this crawl space and then met with the homeowners to work on a game plan that best fits their budget. After going over different options with the homeowner they signed the estimate and we began. First, we removed all of the debris and old vapor barrier. Next, we dug a trench around the interior perimeter of the crawl space in which we placed a 3 inch perforated pipe into a silt sock to create a secure passage for water to collect at the lowest point. Then, at this low point we install our SuperSump Plus. This system pumps all of water that was gathered outside and sends it away from the homes foundation via discharge line. Our LawnScape Outlet is then connected to the line. It is a grated drain that allows water to pass through but will keep debris out. Lastly, to finish this system, we install our 6 mil plastic on top of the dirt floor of the crawl space, which will help block moisture. Down the line when the homeowners are ready for a full encapsulation the transition will be smooth.
This home suffered from bouncy and squeaky floors. The owners knew that if left unaddressed, this could lead to worse foundation issues. To get on top of this issue, the owners contacted John's Waterproofing and scheduled a free inspection. We sent out a design specialist who did a full inspection. Afterwards we sat down with the owners and crafted a repair plan to suit their home and budget. To stabilize the home we had to replace the floating wooden posts with SmartJacks. These adjust to fit the space, and will not succumb to any water issues over the years. We then installed a drain system and sump pump. These will ensure water won't be able to flood the space and damage the vapor barrier and the remaining wooden posts will be able to stay out of water. We installed a new 6 Mil vapor barrier, overlapping edges and running this up the walls. Now the space is on solid ground again.
Fiberglass insulation was not manufactured to be open to the elements. Because of this, it doesn't uphold in a crawl space. The material will absorb moisture out of the air and this causes it to droop away from the subfloor, negating its insulation value. As water rests in it, this leads to mold and mildew which is held up against the underside of the home and it is an appealing material for rodents to use for bedding. This homeowner had gotten tired of having to replace the fiberglass and they wanted a solution that would actually last for them. This is how they ended up online learning about encapsulation. This system uses insulation which is made to last in the crawl space. Along the floor we install our TerraBlock insulation and along the foundation walls we apply spray foam insulation. These two types of insulation will not rot or mildew, but will actually help to keep your home dry and healthy, while lowering the homes heating and cooling costs.
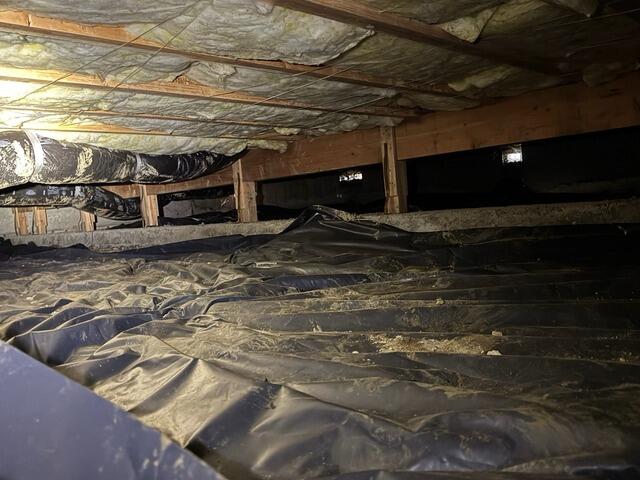
We got a call from this concerned homeowner regarding water in their crawl space. They set up their free estimate and inspection to have their concerns addressed. We sent out one of our knowledgeable system design specialist and he thoroughly inspected the crawl space. When he was done, we met with the homeowner to go over the best options to stop water from entering their home. After going over the estimate, the homeowners decided to move forward with the project. We began by removing all of the debris, including the fiberglass insulation and old vapor barrier. Next, we dug a trench around the interior perimeter of the crawl space in which we then lay a 3 inch perforated pipe into a silt sock that will secure a safe passage for the water to drain to the lowest point. At this low point, we install our SuperSump Plus that will collect all of the water and pump it outside and away from the foundation via discharge line. We then install our Turtl access. This will create entry into the crawl space and can be locked when not in use. To create an insulated barrier between the home and the earth, we install our TerraBlock system directly on the dirt floor. We anchor our CleanSpace system into the foundation walls, up to the rim joists and install it all on-top of our TerraBlock system. We also use a bottle jack to raise the posts to install some of our CleanSpace between the footing and the wooden posts and it is then sealed with our waterproof tape. Next, we make sure to cover and seal all of the vents to prevent outside air from entering.
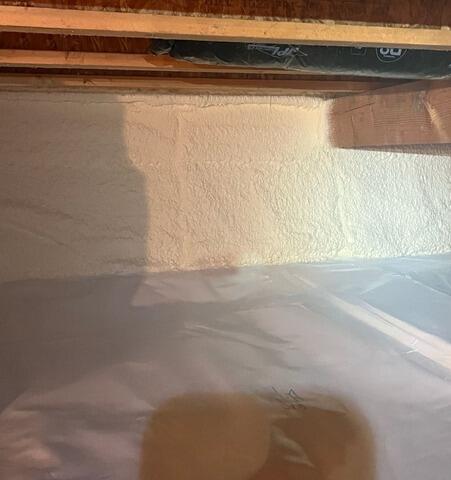
To control the environment, we install our SaniDry Sedona. This effective dehumidifier will dry and filter the air to eliminate damp and musty odors. This will also keep the home at a healthy relative humidity. Lastly, we install our spray foam insulation directly on the foundation walls up to the rim joists to guarantee a complete airtight seal. This crawl space is now fully protected against water, rodents and mold.
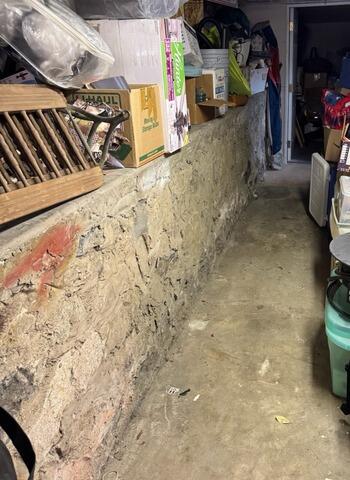
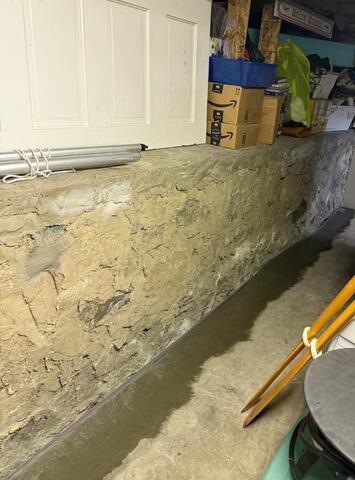
Leaky basement walls can be very frustrating to homeowners. Leaks into basements can cause damage to stored belongings, as well as deterioration of the walls, therefore threatening the structural integrity of your home. It is imperative to have leaky basement walls waterproofed, to protect the longevity and stability of your home. Our crew of Waterproofing Experts installed system - returning peace of mind to these homeowners! To install a WaterGuard System, our crew first cuts a narrow trench into the concrete basement floor, right up against the bottom of the leaking wall. Inside of the trench, they lay down our WaterGuard Collection Tunnel, to catch all wall-water intrusion. After the Tunnel is installed, our crew pours fresh concrete around it, flush with the original floor to hold it in place, and to provide structural stability. When water enters the Tunnel, it is routed to a TripleSafe Sump Pump, which will pump it immediately away from the home. This Pump system is a 3-pump-in-1 machine, where each pump is activated if the previous one fails, or is overwhelmed by water volume. The TripleSafe Pump even works in the event of a power outage, as the last pump is battery operated. We than install a SaniDry Dehumidifier to address any excess moisture within the basement. The installation of our Waterproofing System protects homes from the devastating affects of water damage, and restores structural soundness and longevity to family homes.
our service area